![]() This article covers the process to follow when you want to move from Dbvisit Standby version 7 to Dbvisit Standby version 9 by doing a fresh install.
This article covers the process to follow when you want to move from Dbvisit Standby version 7 to Dbvisit Standby version 9 by doing a fresh install.
There are a few important things to take note of before starting the upgrade.
- You have to create fresh DDC
- You will not be required to recreate the standby database if your standby already exists and is in sync.
- To upgrade to Dbvisit Version 9, your Oracle database must be running Oracle 10.2.0.5 and above. See the Support Matrix
- You’ll have to contact our License and Renewals team to request a new Version 9 license key. The old V7 license will not work on V9.
1. Prepare the version 7 config
- Stop all schedules/cronjobs on both Primary and Standby
- Manually run dbvisit on Primary to send logs
oracle@dbvlab01[/usr/dbvisit/standby]: ./dbvisit MYDB
=============================================================
Dbvisit Standby Database Technology (7.0.72_0_g91da880) (pid 7247)
dbvisit started on dbvlab01: Wed Nov 20 14:45:25 2019 ()
=============================================================

>>> Obtaining information from standby database (RUN_INSPECT=Y)...

>>> Note FORCE_LOGGING is disabled in the primary database.

>>> Sending heartbeat message... - done.
>>> Checking Dbvisit Standby for configurational differences between dbvlab01 and
 dbvlab03...

No configurational differences found between dbvlab01 and dbvlab03.

>>> Log file(s) for MYDB will be transferred from dbvlab01 to dbvlab03...

> Transferring 'thread_1_seq_30.281.1024843237' to server dbvlab03:7890
 Progress: 0%...20%...40%...60%...80%...100% [126176 KB/s] - done.

1 archive log transfer to dbvlab03 for MYDB completed.
 Last sequence was 30.
 No Mail sent as SEND_MAIL_FLAG = N

=============================================================
dbvisit ended on dbvlab01: Wed Nov 20 14:45:31 2019
=============================================================
3. Manually run dbvisit on Standby to apply logs
oracle@dbvlab03[/usr/dbvisit/standby]: ./dbvisit MYDB
=============================================================
Dbvisit Standby Database Technology (7.0.72_0_g91da880) (pid 7236)
dbvisit started on dbvlab03: Wed Nov 20 14:53:42 2019 ()
=============================================================

>>> Sending heartbeat message... - done.
>>> Log file(s) for MYDB from dbvlab01 will be applied to dbvlab03
201911201453 - Log seq 30 thread 1 applied to standby database MYDB.
 No Mail sent as SEND_MAIL_FLAG_DR = N

=============================================================
dbvisit ended on dbvlab03: Wed Nov 20 14:53:43 2019
=============================================================
4. Manually run a log gap report on Primary to ensure no gap exists.
oracle@dbvlab01[/usr/dbvisit/standby]: ./dbvisit -i MYDB
=============================================================
Dbvisit Standby Database Technology (7.0.72_0_g91da880) (pid 7455)
dbvisit started on dbvlab01: Wed Nov 20 14:54:22 2019 ()
=============================================================

Dbvisit Standby log gap report for MYDB at 201911201454:
-------------------------------------------------------------
Standby database on dbvlab03 is at sequence: 30.
Primary database on dbvlab01 is at log sequence: 31.
Primary database on dbvlab01 is at archived log sequence: 30.
Dbvisit Standby last transfer log sequence: 30.
Dbvisit Standby last transfer at: 201911201445.

Archive log gap for MYDB: 0.
Transfer log gap for MYDB: 0.
Standby database time lag (HH:MI:SS): 00:13:46.
 No Mail sent as SEND_MAIL_FLAG = N

=============================================================
dbvisit ended on dbvlab01: Wed Nov 20 14:54:24 2019
=============================================================
5. Stop all Dbvisit processes on Primary and Standby.
7. Take a back up of existing v7 in case you would want to revert back
8. Once you have successfully installed and running the Dbvisit v9 version, don't forget to uninstall the Dbvisit standby v7 repository from the oracle database.
https://dbvisit.atlassian.net/wiki/spaces/UGDS7/pages/19005557/Uninstalling+Dbvisit+Standby
2. Installation of Dbvisit standby Version 9
Please refer installation guide
https://dbvisit.atlassian.net/wiki/spaces/DS9QSG/pages/1244987646/Installing+Dbvisit+Standby
3. Start the Dbvisit Process on both Primary and Standby servers
1. Start the Dbvisit processes from the new Install Base on Primary
oracle@dbvlab01[/usr/dbvisit]: cd dbvnet/
oracle@dbvlab01[/usr/dbvisit/dbvnet]: ./dbvnet -d start
Dbvnet daemon started.
oracle@dbvlab01[/usr/dbvisit/dbvnet]: cd ..
oracle@dbvlab01[/usr/dbvisit]: cd dbvagent/
oracle@dbvlab01[/usr/dbvisit/dbvagent]: ./dbvagent -d start
Dbvagent daemon started.
oracle@dbvlab01[/usr/dbvisit/dbvagent]: ps -ef | grep dbv
oracle 4412 1 0 15:16 ? 00:00:00 ./dbvnet -d start
oracle 4416 1 0 15:16 ? 00:00:00 ./dbvagent -d start
oracle 4423 4325 0 15:16 pts/0 00:00:00 grep d
2. Start the Dbvisit processes from the new Install Base on Standby
oracle@dbvlab03[/home/oracle]: cd /usr/dbvisit/dbvnet/
oracle@dbvlab03[/usr/dbvisit/dbvnet]: ./dbvnet -d start
Dbvnet daemon started.
oracle@dbvlab03[/usr/dbvisit/dbvnet]: cd ..
oracle@dbvlab03[/usr/dbvisit]: cd dbvagent/
oracle@dbvlab03[/usr/dbvisit/dbvagent]: ./dbvagent -d start
Dbvagent daemon started.
oracle@dbvlab03[/usr/dbvisit/dbvagent]: cd ..
oracle@dbvlab03[/usr/dbvisit]: cd dbvserver/
oracle@dbvlab03[/usr/dbvisit/dbvserver]: ./dbvserver -d start
Dbvserver daemon started.
oracle@dbvlab03[/usr/dbvisit/dbvserver]: ps -ef |grep dbv
oracle 4174 1 0 15:18 ? 00:00:00 ./dbvnet -d start
oracle 4178 1 0 15:18 ? 00:00:00 ./dbvagent -d start
oracle 4186 1 0 15:18 ? 00:00:00 ./dbvserver -d start
4. Access the GUI from the web browser
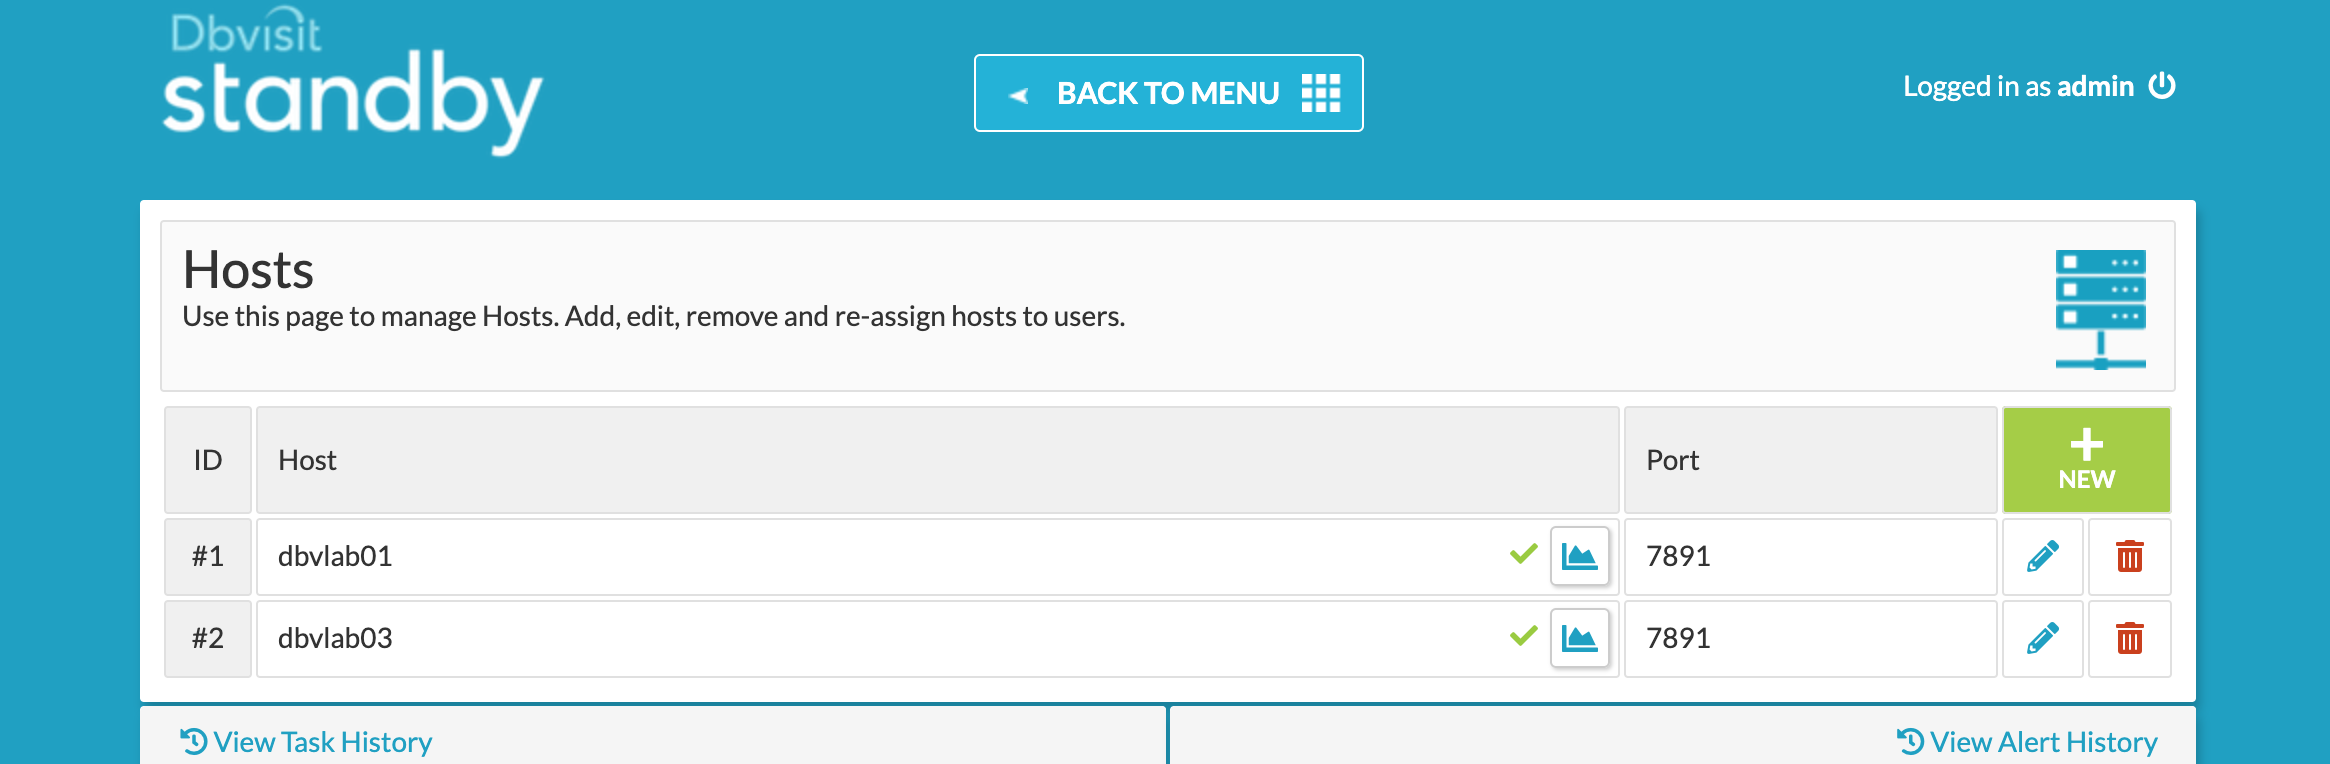
Adding Hosts
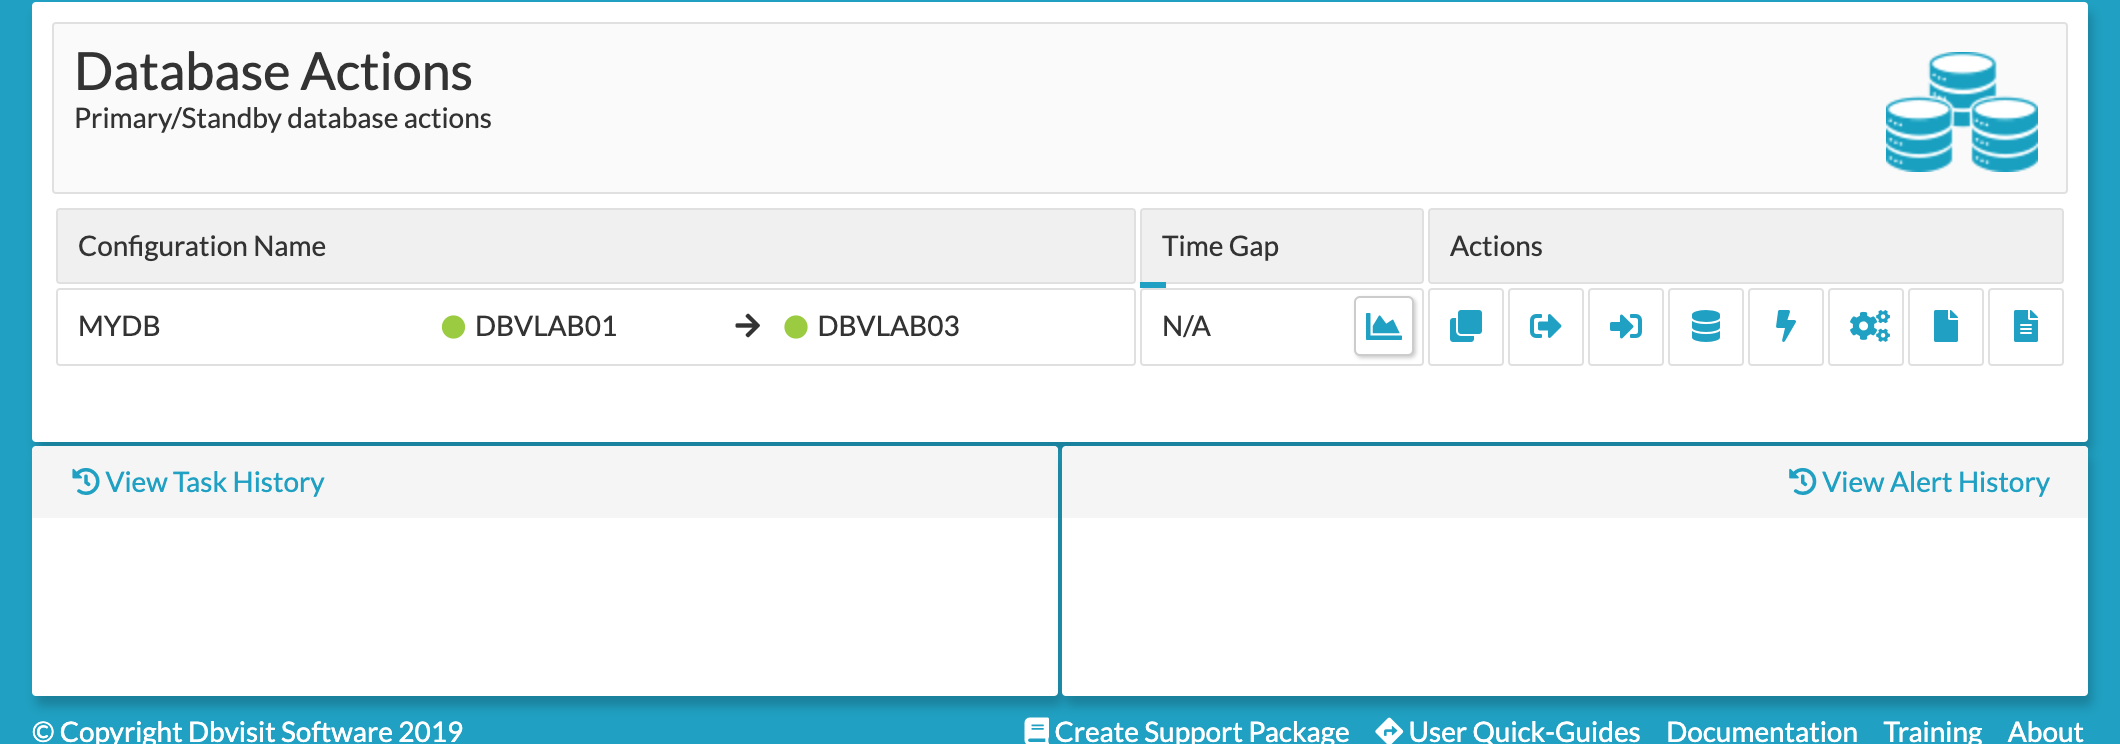
5. Creating DDC
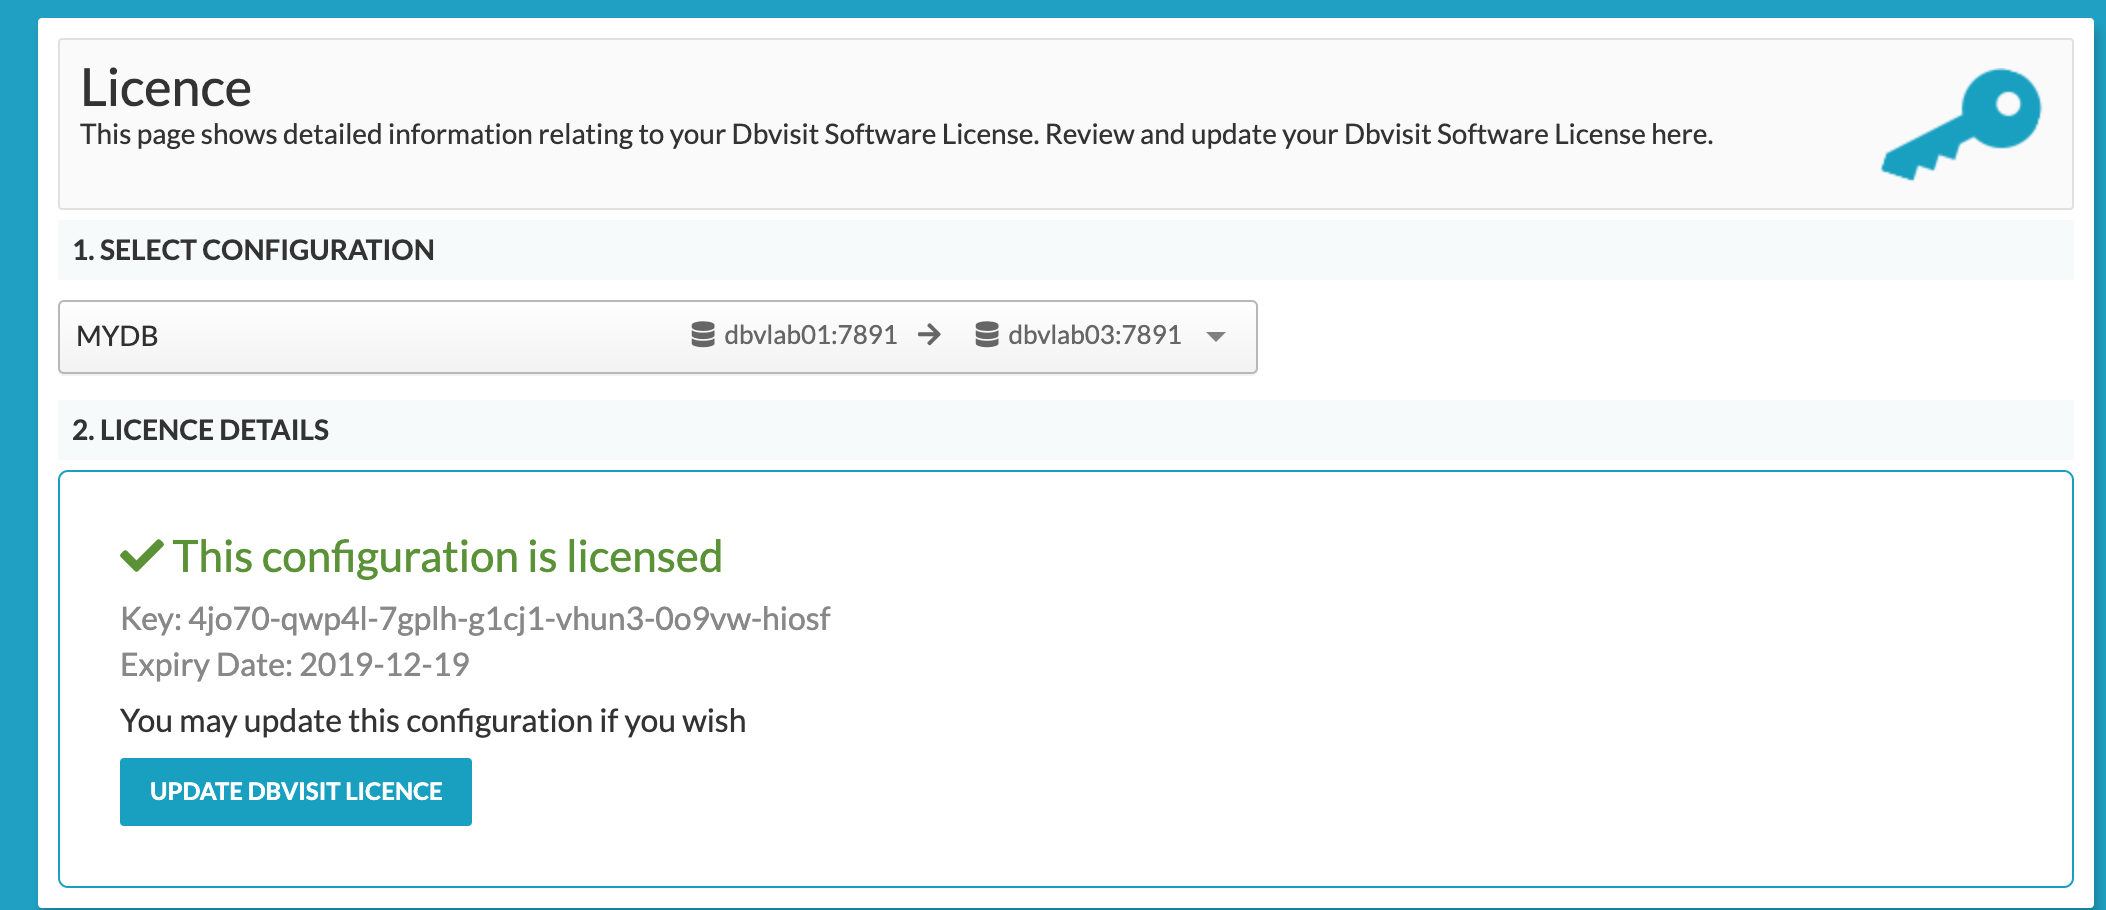
6. Applying new License Key
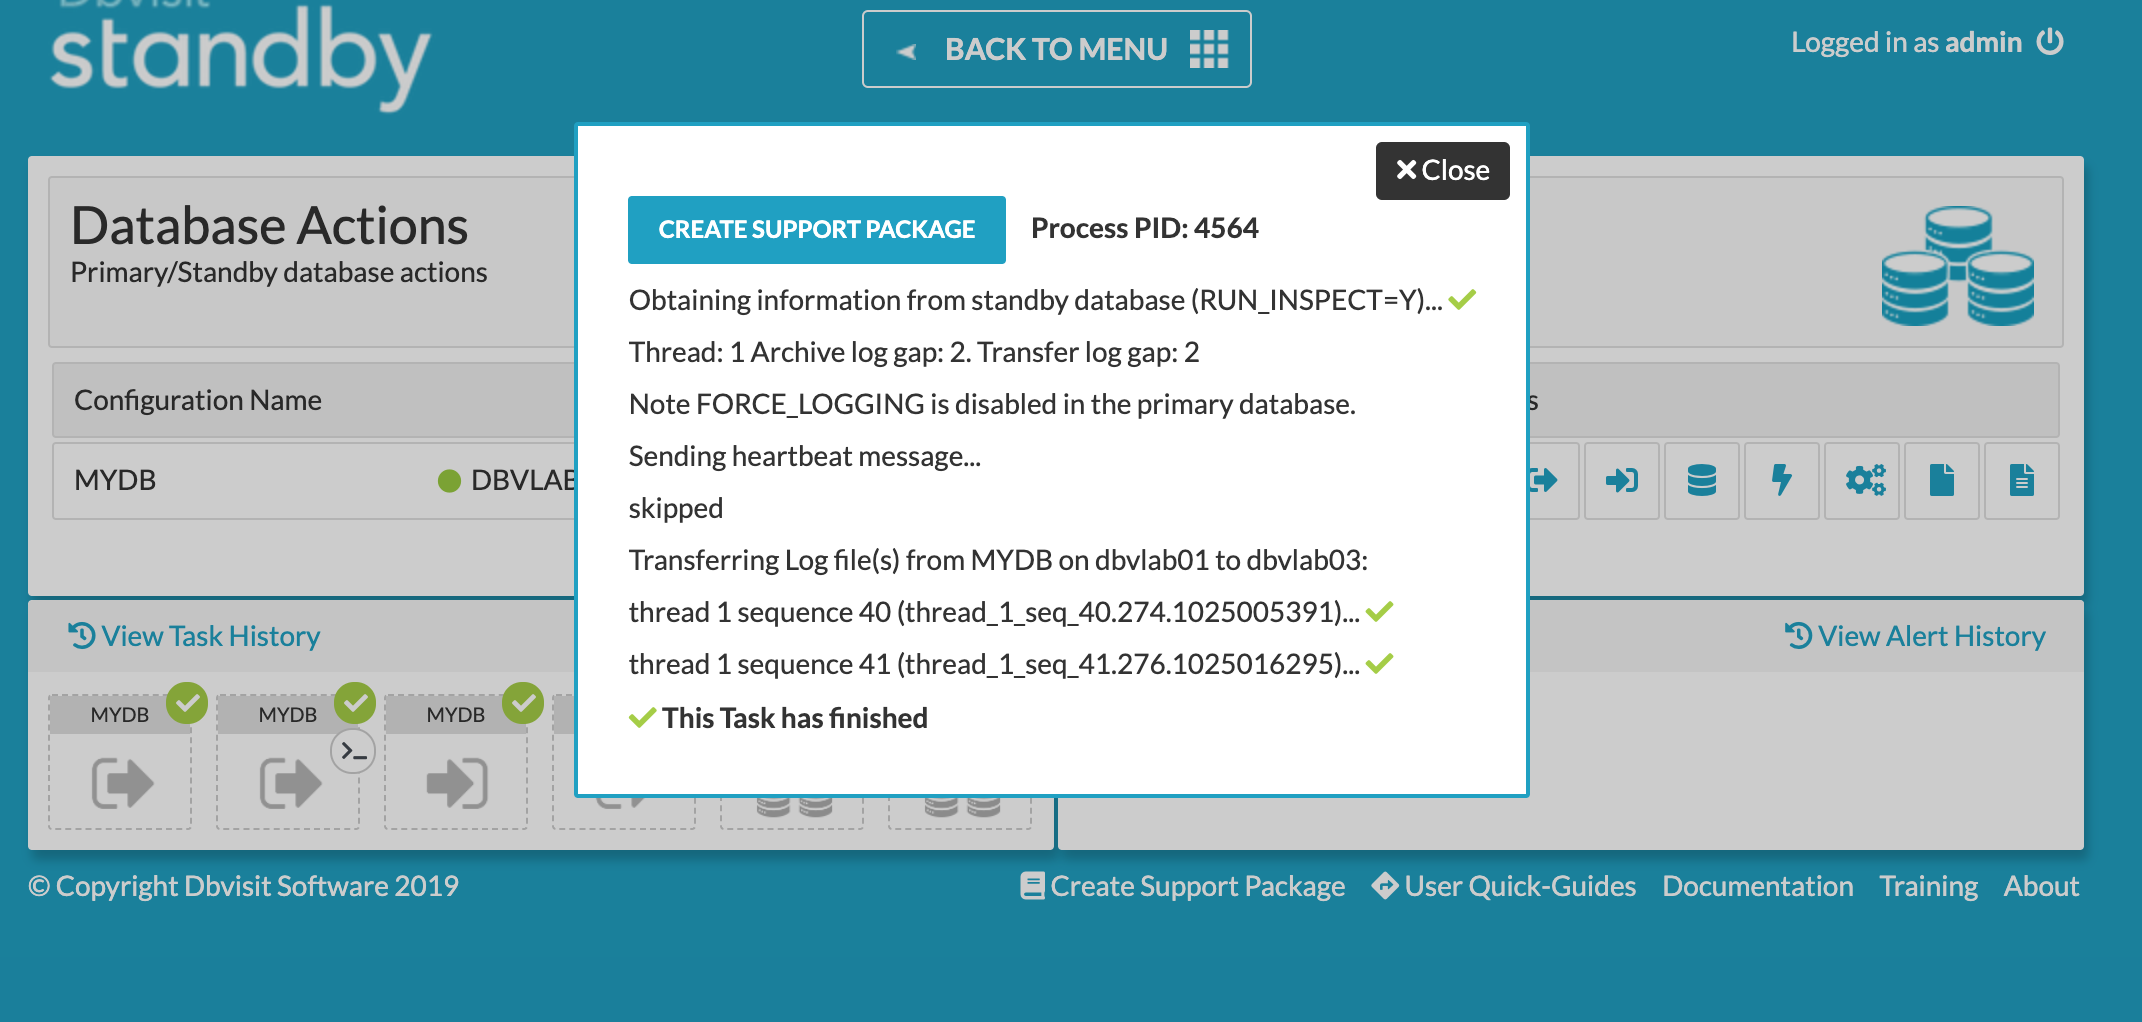
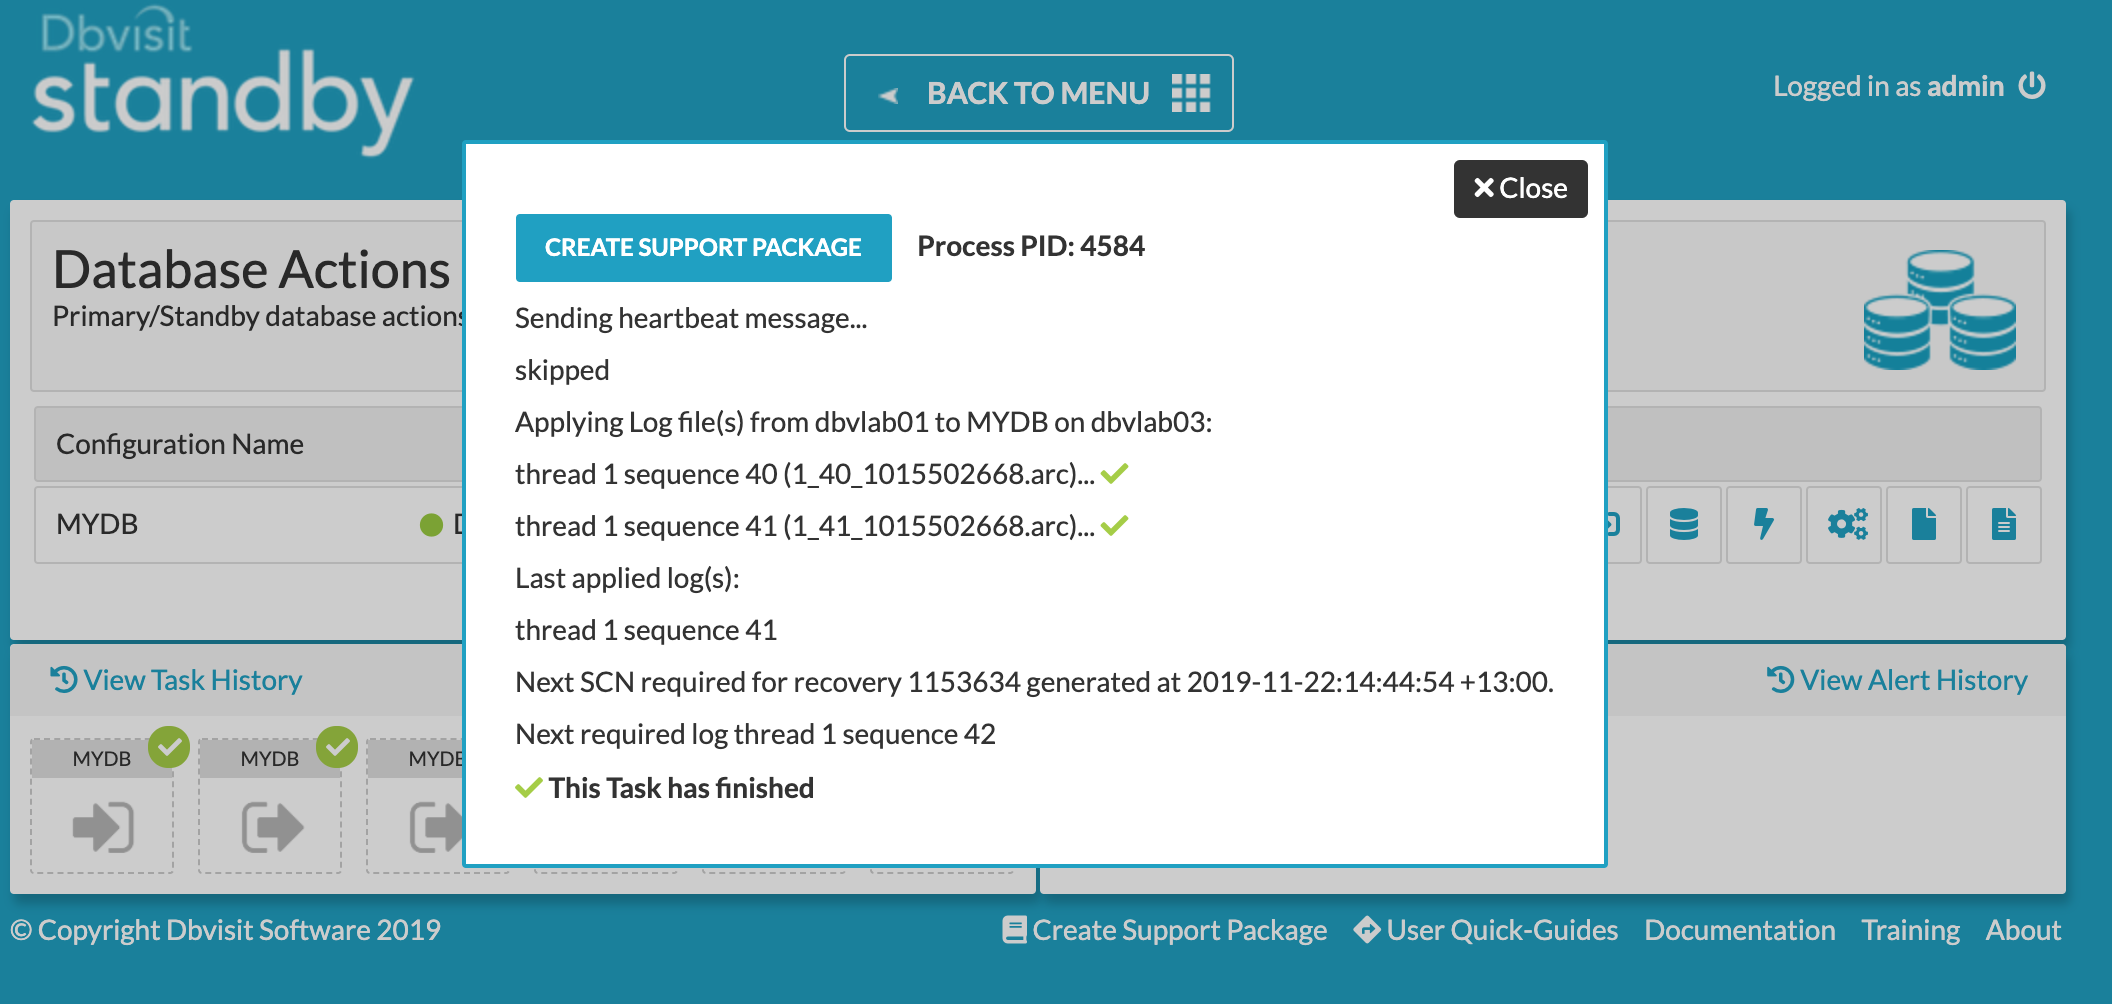
7. Send and Apply Logs
1. Run dbvisit on Primary to send logs
2. Run dbvisit on Standby to apply logs
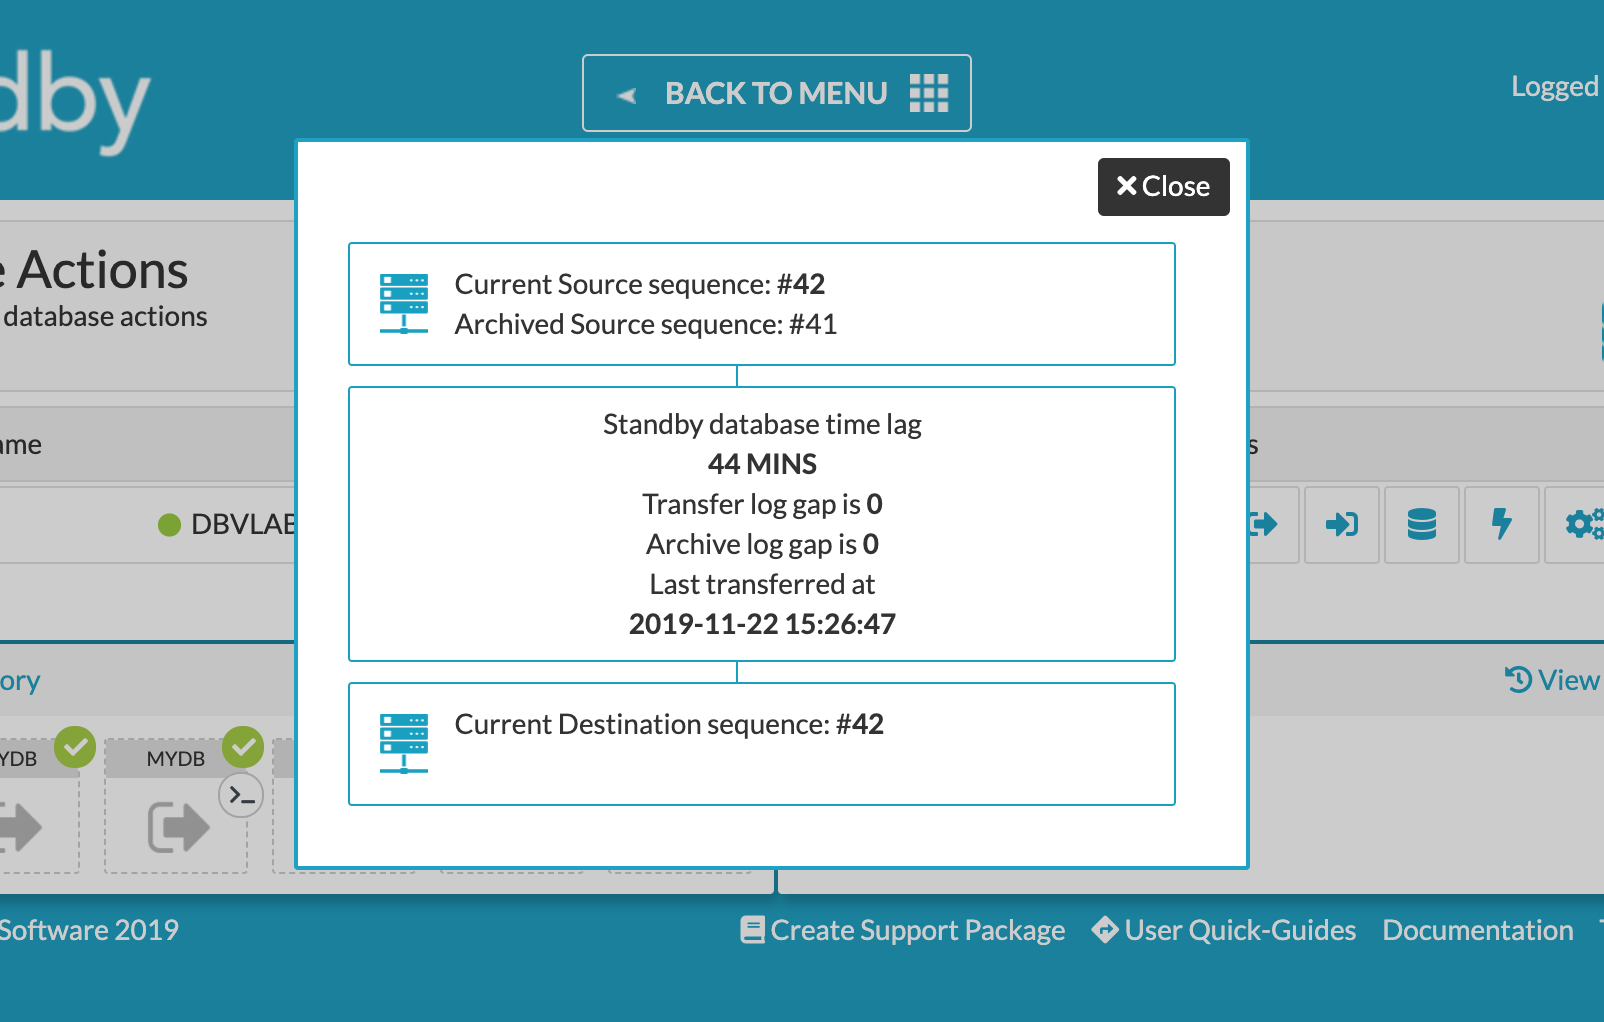
2. Run log gap report
7. Post-installation steps.
- Start the daemon processes to allow Dbvisit Standby to run in the background (or enable normal schedules)
https://dbvisit.atlassian.net/wiki/spaces/DS9QSG/pages/1244990393/E-Mail+Notification+Configuration
- Configure AMM (Archive Log Management Module) as required
Comments